
Learning Center · Finding documentation
How to Photograph a Card Defect Clearly
To show one specific card defect, make a short photo sequence: a full-card reference, a normal-scale view of the area, a focused close-up, and—if light changes its visibility—an angled-light view of the same location. Keep the card's orientation and the original image files so another person can find the mark and understand how it appears at ordinary size. This is documentation of an observation, not a professional grade estimate.
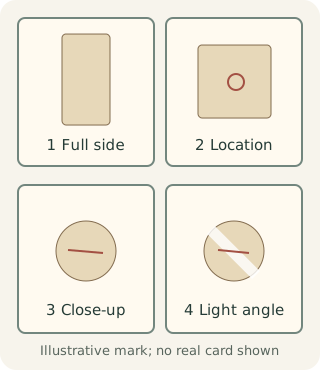
Start with the location, not the close-up
A very tight crop can show a line but hide which card, side, or corner it belongs to. Photograph the full front or back in even light with all physical edges visible. Then make a context image that includes the finding and a nearby printed landmark, such as a name, border corner, or image feature. Only after those two views take a close-up. This sequence lets a buyer, seller, or reviewer move from object to location to detail without guessing at scale.
Record the side and position in plain language: “Back, lower-left corner,” or “Front foil, line beside the second letter of the name.” Keep the top of the card oriented the same way through the set. If you rotate the card or image to make a mark easier to see, say so in the file label or note. Do not draw over the only copy of the image. A simple filename set such as front-full, front-upper-right-context, and front-upper-right-close keeps the evidence together.
Make the detail image legible
Support the card on a clean, stable surface. Move the camera close enough for useful detail while keeping the suspect area in focus; if the phone cannot focus at that distance, back away and use a later crop from the full-resolution image. Digital zoom and aggressive sharpening can magnify compression blocks, create pale edge halos, or make a faint mark appear harsher than it is. Save an original image before cropping or adjusting exposure. A close-up without a normal-scale comparison can exaggerate a small finding.
Keep a sliver of surrounding card art or border in the frame as context. A magnifier or phone macro mode may help with a small edge issue, but the tool is optional and focus becomes harder close up. The magnification guide explains when enlargement adds evidence and when it simply enlarges uncertainty. Do not press the lens, ruler, or any scale object against the card. If a reference object is useful, place it outside the card's edge without obscuring the mark.
Choose a view that fits the finding
For corner whitening or an edge chip, take a square context image showing the neighboring border, then a focused close view. Photograph both sides if the same physical location might be affected on the reverse. For a scratch or scuff on glossy material, add a moving-light sequence: reflection before the marked spot, crossing it, then beyond it. Keep the printed landmark in view so the line's location can be compared. For a shallow dent or crease, one angle may show a disruption in reflection while another shows the card's overall shape. Do not bend or touch the area to make the finding visible.
A spot or narrow line may be print-related, later damage, dust, or a mark on protective plastic. Photograph what can be seen first. If the mark shifts relative to printed artwork, another optical layer or glare may be involved; if it vanishes at a new angle, the light may simply have hidden it. Neither observation alone proves origin. Use the mark-investigation guide for cause questions and the holder-layer guide for plastic-versus-card questions.
Keep the photo set small and honest
One useful set is four to six images, not twenty nearly identical close-ups. Include the full side, a context frame, one sharp close-up, and two or three light-angle frames only when the feature changes with light. Select images that answer different questions. If all views show the same thing, keep the clearest. A short note should state what is visible in each file and what remains uncertain. If the focus misses the mark in every frame, retake it rather than asking someone else to infer a defect from blur.
Do not apply an “enhance” filter, erase dust digitally, paint a circle over the only original, or increase contrast until the card looks unlike the scene. A separate annotated copy can point to the area, provided the unaltered original remains available. If automatic phone processing produces a strange halo, include a wider, less processed view when possible. Images should communicate the actual observation, not win an argument about condition.
Example: documenting an uncertain line
Suppose you see a faint line near the lower front border of a sleeved card. First take a full front photo. Next photograph the lower third with the border and printed text visible. Make a focused close-up of the line, then two angled-light images with the reflection on either side of it. Label the set “lower-front line; card or sleeve layer unresolved” if that is what the images support. The example is hypothetical; it does not represent a tested card or a confirmed defect.
Send the compact set with a neutral request: “I can see a fine line near the lower front border in the close-up. The full view and two angled photos are attached. Can you tell whether it appears in hand, and whether the card can be viewed safely without the outer holder?” A seller may not be able to resolve the layer safely. Record that limit rather than demanding risky removal. For initial full-card setup, read the general photography guide; this page focuses on preserving one finding so another person can judge the evidence.