
User guide
Centering Guide
Learn how to upload a card photo, place edge guides, correct perspective, and understand centering results.
Quick start
Measure centering in five steps
Use this path when you just want to get from photo to centering readout quickly.


Photo setup
Best photo checklist
A better source photo makes crop, perspective correction, and guide placement easier.
- Full card is visible.
- All four edges are in frame.
- Card fills most of the image.
- Photo is straight-on when possible.
- Minimal glare or blur.
- Background contrasts with the card edge.
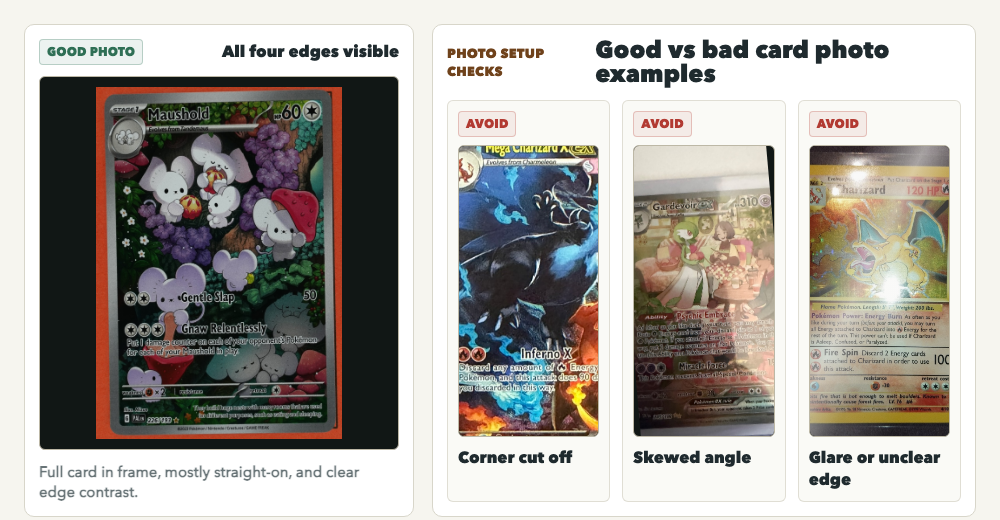
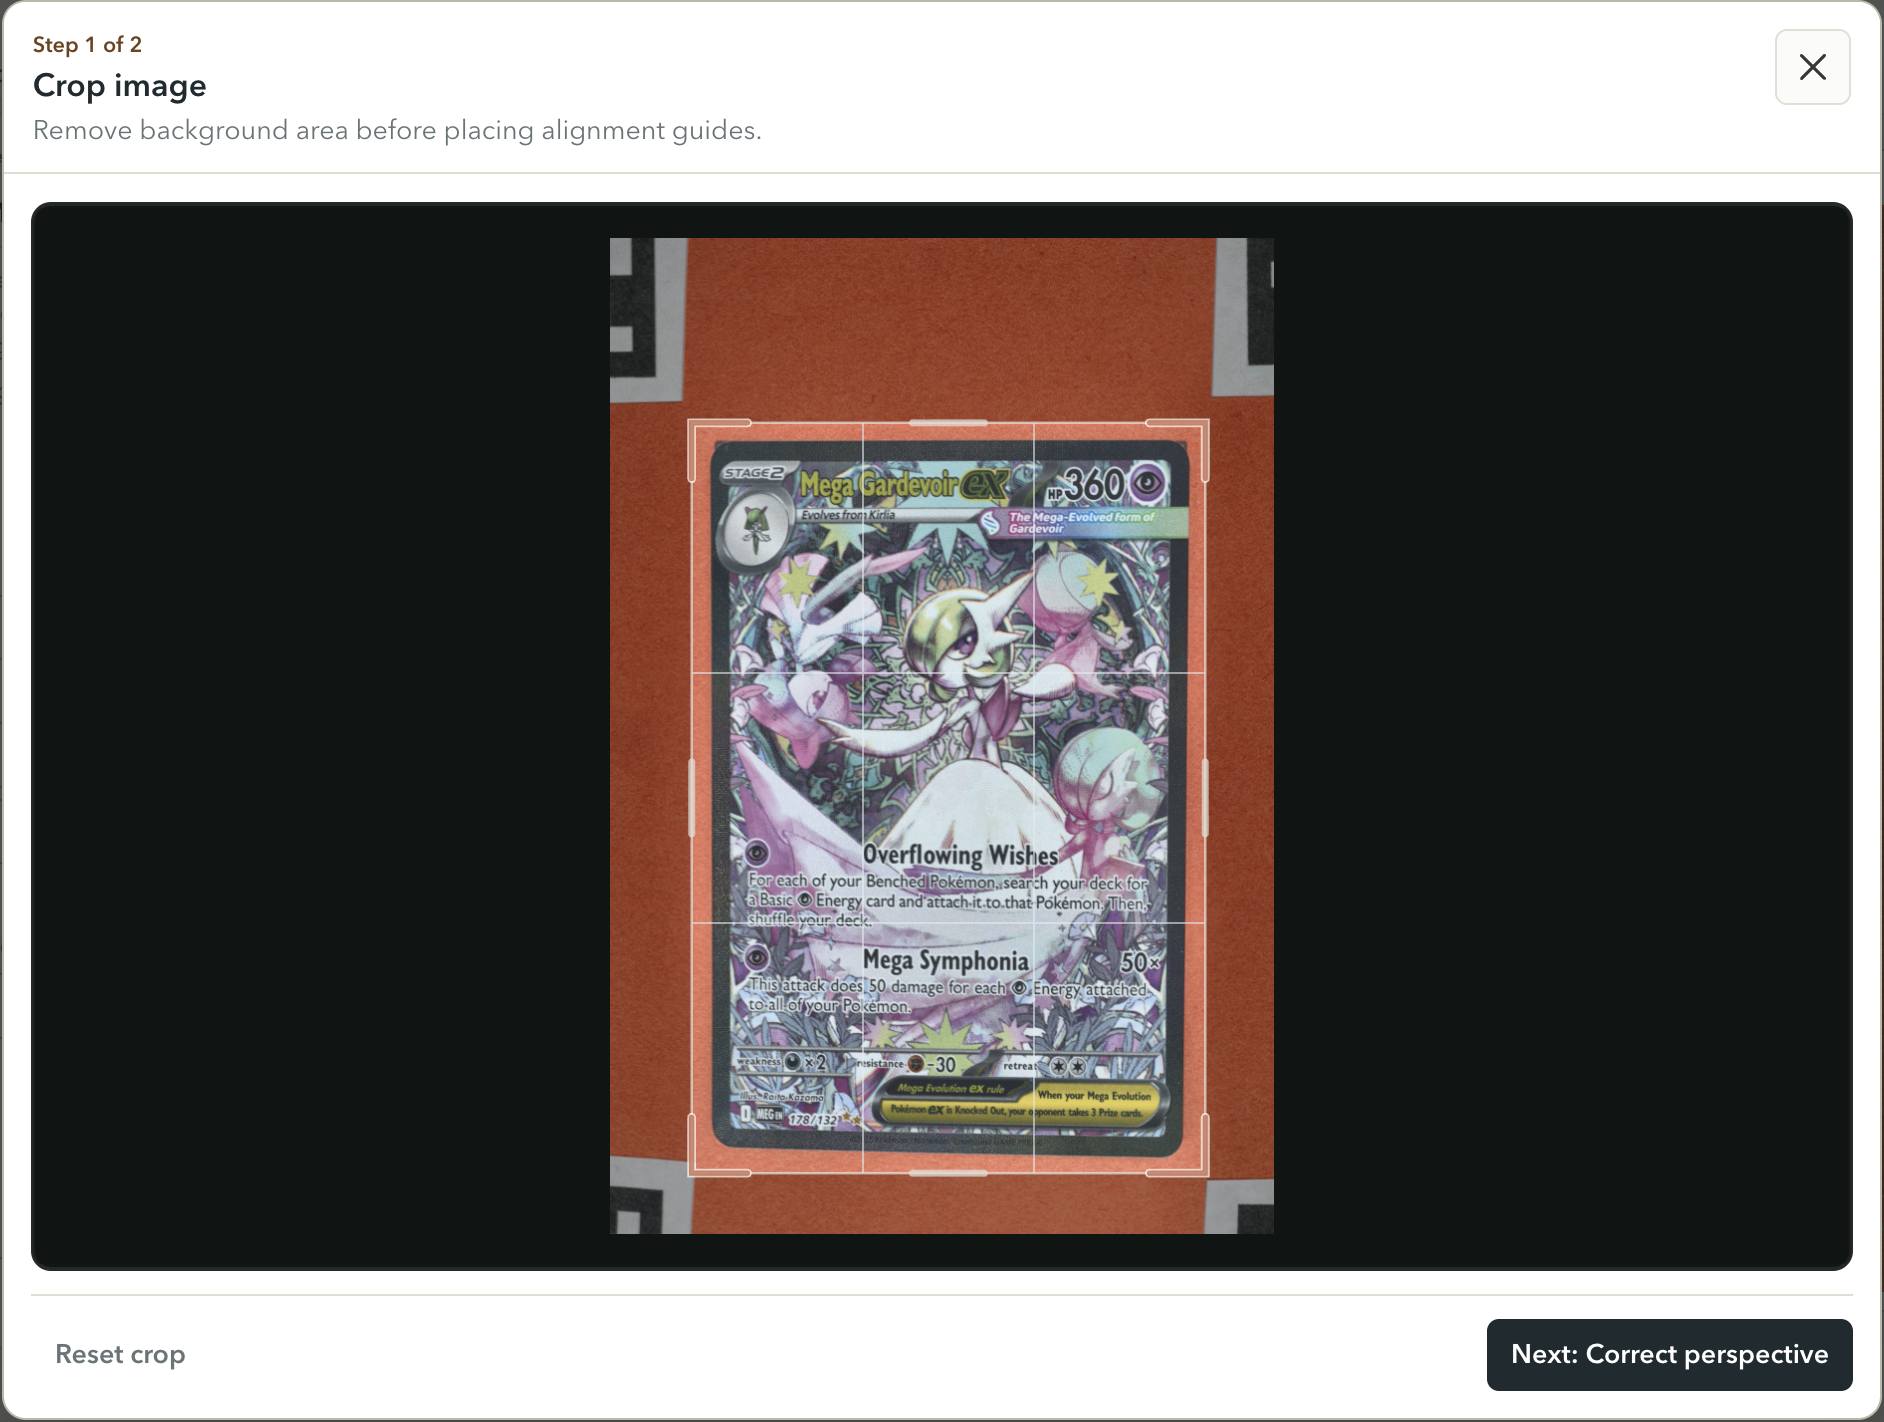
Image preparation
Crop vs perspective correction
Crop removes background. Perspective correction fixes a photo taken from an angle.
Use crop when
- You only need to remove extra background.
- The card is already mostly straight.
- All corners are visible.
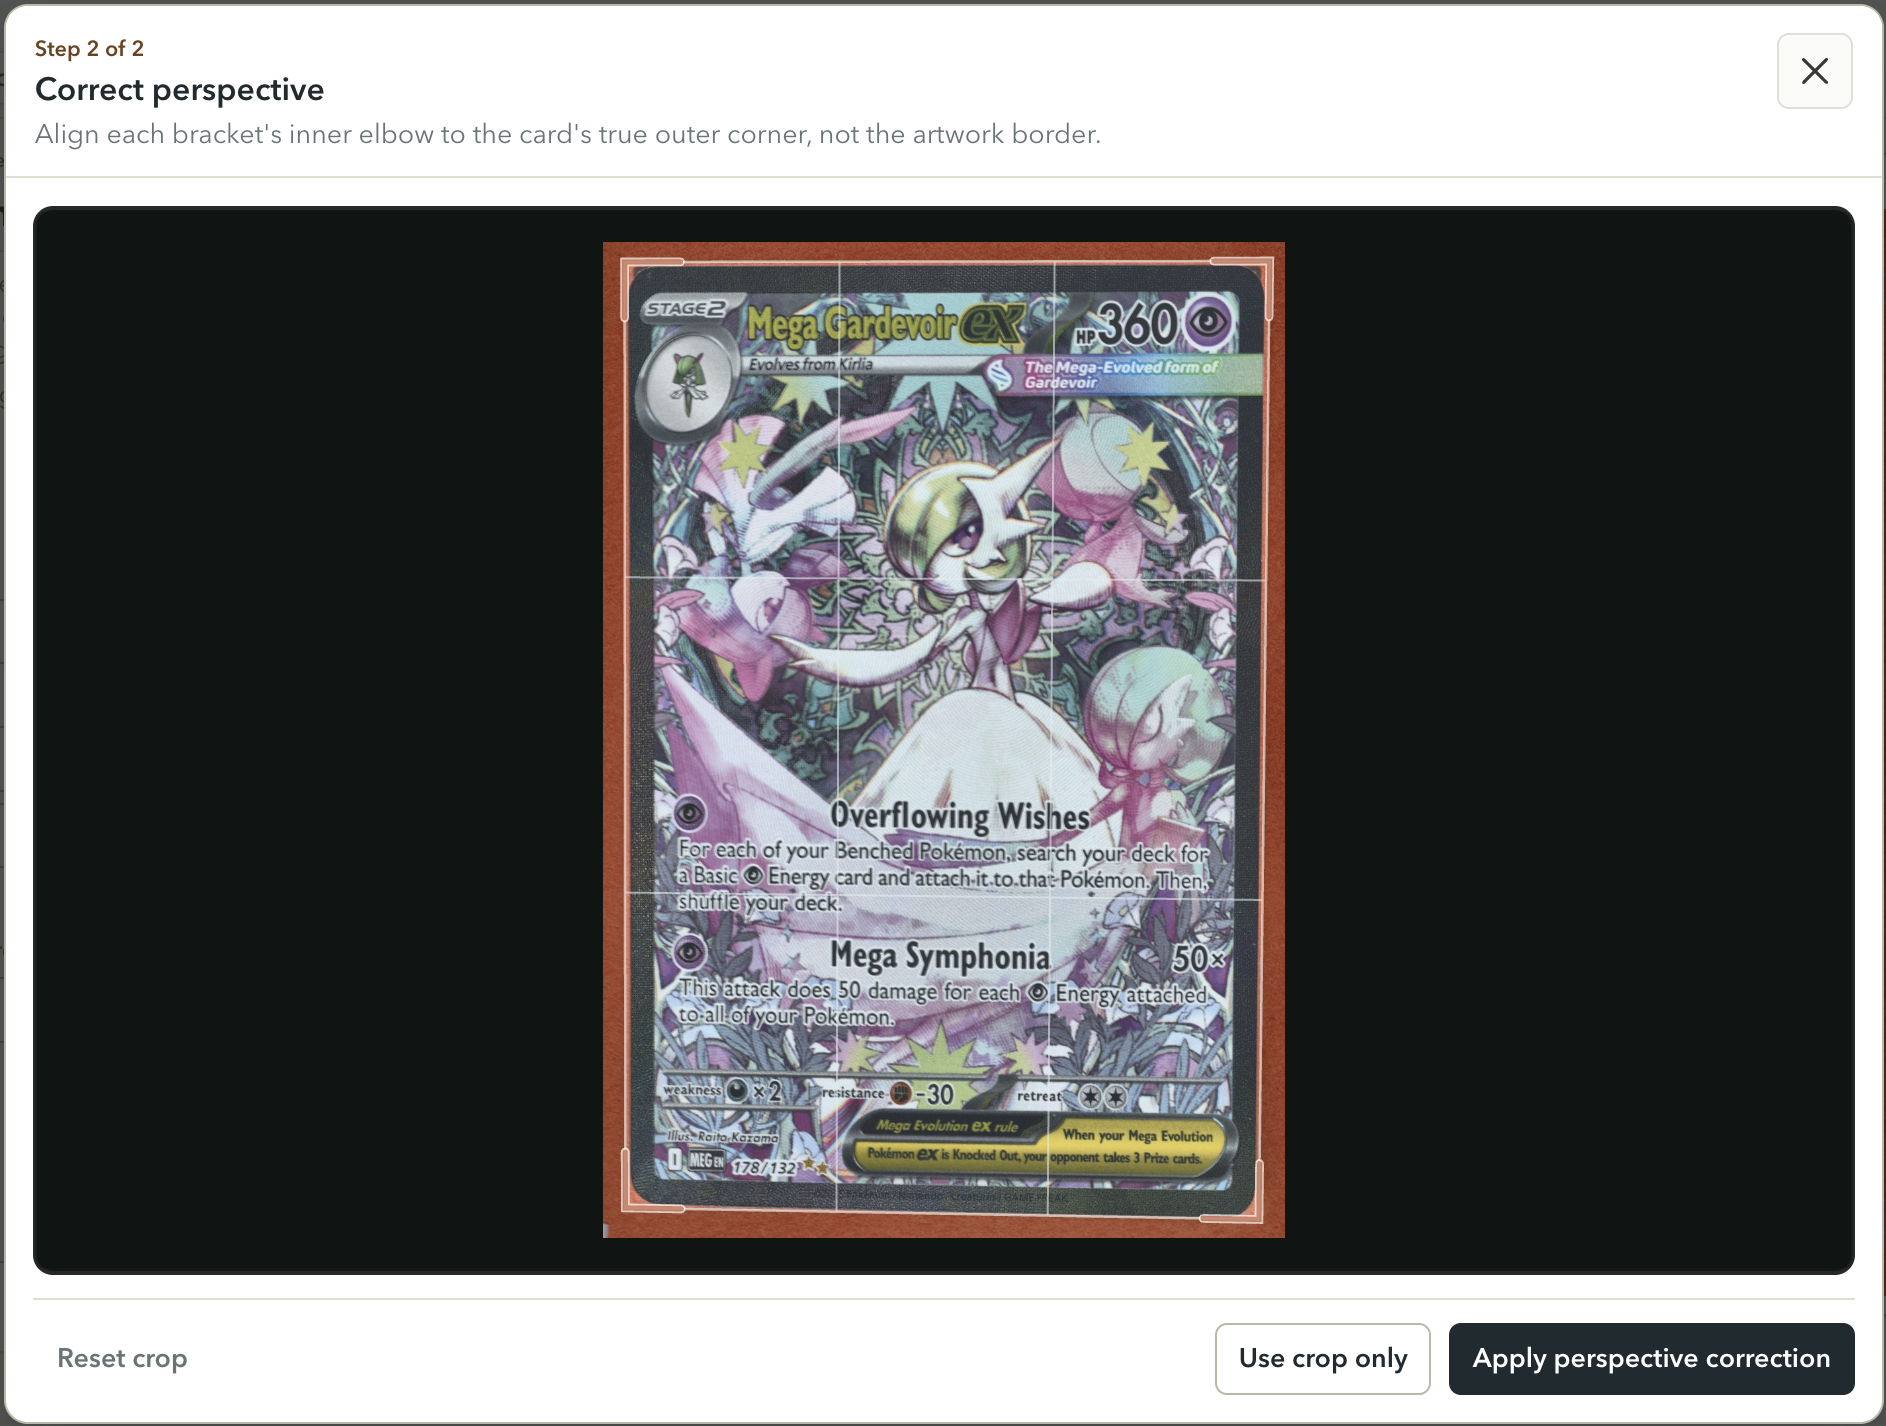
Use perspective correction when
- The card looks skewed.
- The sides are not parallel.
- The photo was taken at an angle.
- The card looks trapezoidal.
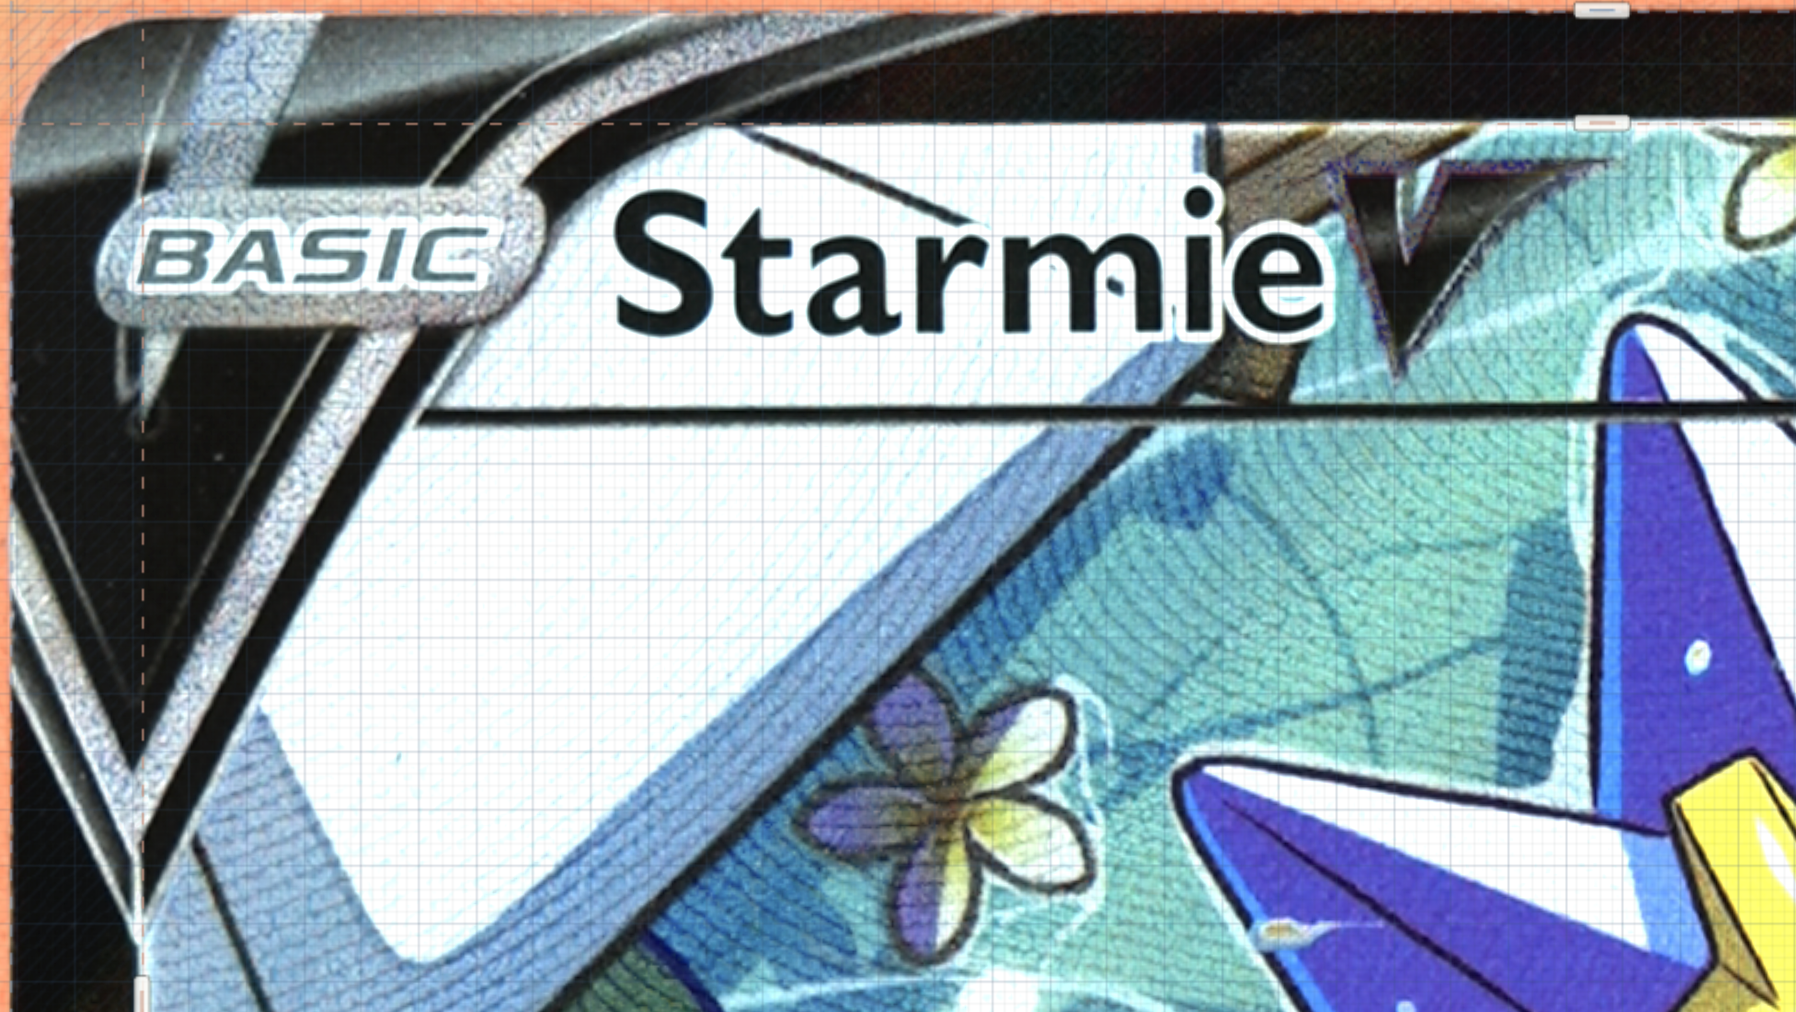
Align each bracket's inner elbow to the card's true outer corner, not the artwork border.
Alignment
How to place guides
The guide line should sit on the true outside edge of the card. Your eye makes the final call.
- Start in Fit view so you can see the whole card.
- Place guides by eye on the true outer card edge.
- Use zoom for precision near each edge.
- At 1.25x zoom or higher, use suggested edge assist as a final check.
- Recheck guide placement after crop or perspective correction.
Edge assist is a helper, not an automatic measurement. Ignore it if it does not match the visible edge.
Zoom detail
Suggested edge assist
Edge assist may appear at 1.25x zoom or higher when there is enough contrast near the card edge.
Edge assist details
How to use it
- Drag the guide close by eye first.
- Zoom in for a final check.
- Use the assist only if it matches the visible edge.
- Ignore it if the suggestion looks wrong.
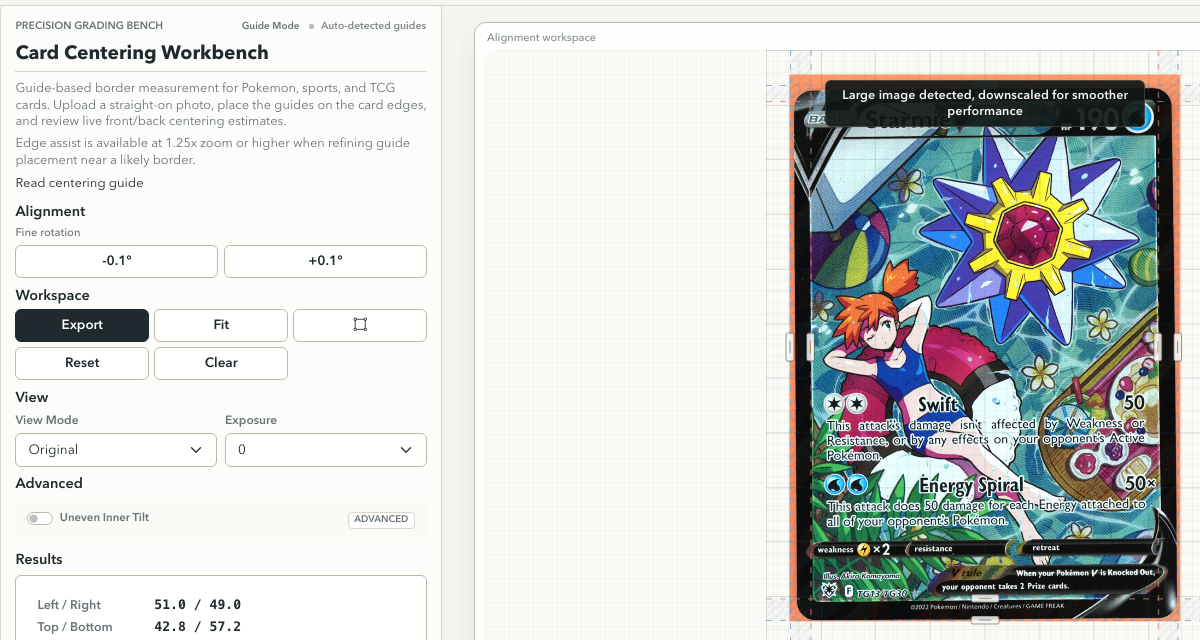
Readout
Understanding results
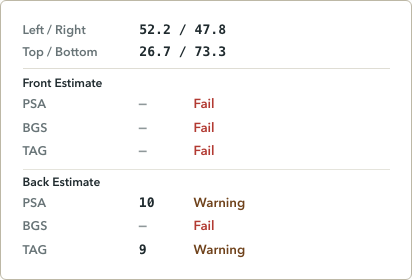
Centering results compare the visible border width on each side of the card.
Front Estimate
- The larger number indicates the wider border.
- Warning means the result is near or outside a target threshold.
- Fail means the result likely falls outside that grader's centering threshold.
- Estimates are centering-only references, not final card grades.
Visibility tools
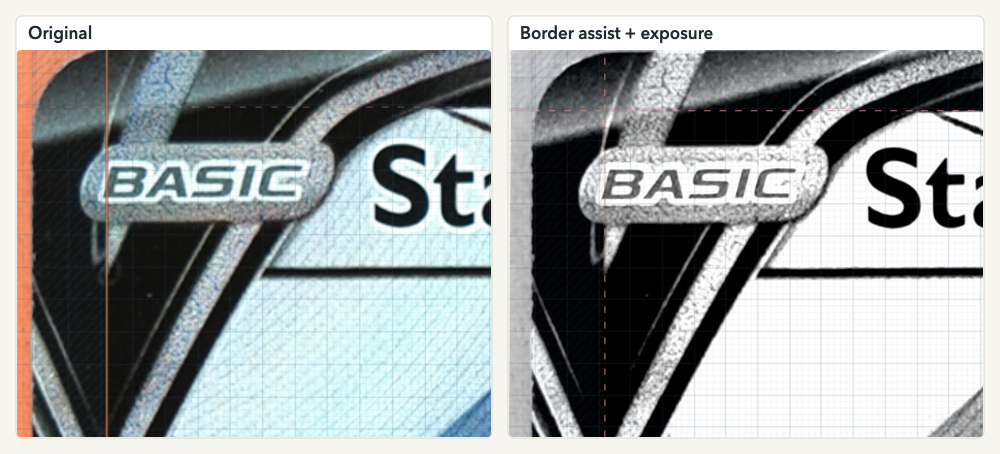
View mode and exposure
These controls help you see edges more clearly. They do not change guide measurements.
View and exposure details
- View modes can make card edges easier to separate from artwork or background.
- Exposure helps when a photo is too dark or too bright.
- Use these as visual aids only; the guide positions still define the measurement.
Troubleshooting
Common issues
Use these checks when the photo, guides, or results do not look right.
Photo looks skewed
Use perspective correction before placing guides.
Border and artwork are hard to separate
Zoom in and try a different view mode or exposure.
Edge assist does not appear
Zoom to 1.25x or higher and check for edge contrast.
Results changed after correction
Recheck guide placement after crop or perspective correction.
Card has uneven inner tilt
Use the advanced uneven inner tilt control only when needed.
Reference
Centering-only grade estimates
These are quick centering-only estimates based on published or referenced thresholds. They are not final grading predictions.
Reference thresholds
How estimates are chosen
The estimate uses the worse of the two axes. If Left / Right and Top / Bottom land in different buckets, the lower centering result wins. Front and back are shown separately because grading companies use different thresholds for each side.
Reference sources
- PSA grading standards - 10: Front 55/45, Back 75/25; 9: Front 60/40, Back 90/10
- BGS grading standards - 10 Black Label / 10: Front 50/50, Back 55/45; 9.5: Front 55/45, Back 60/40
- TAG grading rubric - 10: Front 55/45, Back 65/30; 9: Front 60/40, Back 75/25
- CGC grading scale - 10 Pristine: Front 50/50, Back 50/50; 10: Front 55/45, Back 75/25; 9: Front 60/40, Back 90/10
Next step
Ready to measure a card?
Upload a straight-on photo and use the guide workspace to check centering.